How to Use?
Har Obtain
1. What is HAR?
HAR: https://toolbox.googleapps.com/apps/har_analyzer/?lang=
2. Packet capture
2.1. Chrome or Edge
- Press
F12,Ctrl + Shift + I, or from the Chrome menu selectMore tools>Developer tools. - From the panel that opens at the bottom of your screen, select the
Network tab. - Make sure the
Recordbutton in the upper left corner of theNetwork tabis shown in red. - If it's grey, click it once to start recording.
- Check the box next to
Preserve log.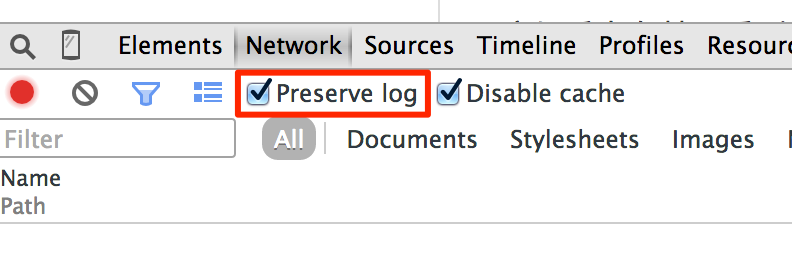
- Click the
Clearbutton to clear out any existing logs from theNetwork tab. - Now try to reproduce the task you were trying to do.
- Once you have reproduced the task, right-click anywhere on the grid of network requests.
- Select
Save as HAR with Content.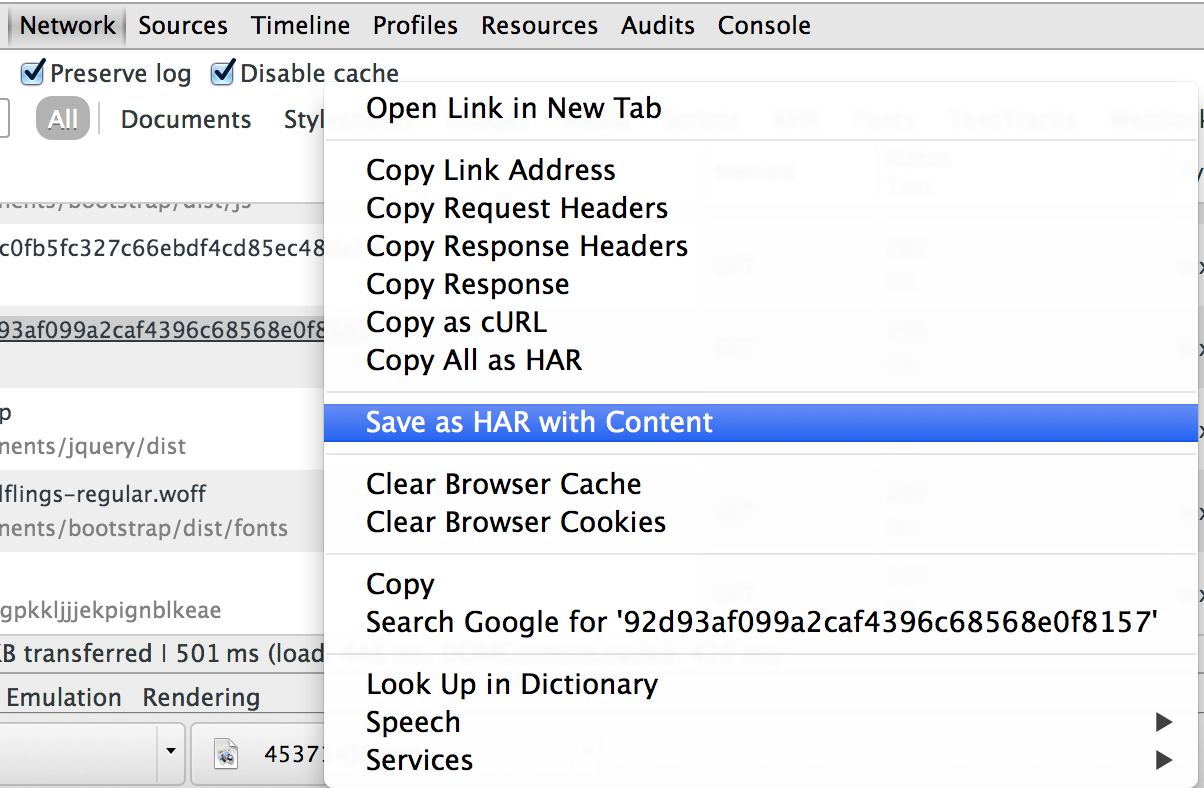
- Save the file to your computer.
2.2. Firefox
- Press
F12(or Go toTools>Web Developer>Network). - Now try to reproduce the task you were trying to do.
- Right-click on the loaded results.
- Select Save all as har.
2.3. Windows - Fiddler
- Open Fiddler, open the
Toolsmenu, selectOptions. - Select the
HTTPS tab, checkCapture HTTPS Connects. - Select the
Connections tab, checkDecrypt HTTPS traffic. - Now try to reproduce the task you were trying to do.
- export to HAR format - please select HTTPArchive as the export method.
2.4. IOS - Stream
- Open Stream.
- Before capture the HTTPS request, you need to install the CA certificate,
setting>General>About>Certificate Trust Settingsto trust the CA certificate. - Click the start packet capture button, the phone will automatically pop up the VPN configuration window, and then select Allow.
- Now try to reproduce the task you were trying to do.
- On the app page, click Stop Capture to end this capture.
- export the HAR file.
3. Community HAR
- Click the
Community Templatebutton to the right ofmy template. - Update the repository to get the latest HAR file list.
- Select the HAR file you want to use and click the
Subscribebutton to subscribe to the template. - Modify the template according to your needs.
- Then jump to
step 5of 3. Edit the template to continue editing.
Upload the HAR file
- Access and login to QD framework.
- Click the
+button to the right ofmy template. - Upload the HAR file you just saved.
- Click
uploadto continue.
Edit the template
- Replace the username, password, cookie, header and other parts that change according to the user with a template similar to
{{ username }}. (templates support jinja2 syntax) - Use the test panel in request editing to test whether the template is returned correctly, use the correct and wrong user names to test。
- Fill in
success/failure assertion, which helps to detect sign-in failures and template failures. - When some data from the previous request is needed in the request, variable extraction is used to extract the data through regularization and save it in the environment variable. Use
ab(\w+)cd, the group selector, to select part of it. - Use
__log__to extract task logs. - When all request edits are complete, use
Testnext to the Download button to test the overall. - The template being edited will be automatically saved in the browser cache, so don't worry about losing it.
- Click the
Savebutton to save the template. - Click the
Downloadbutton to download the template.
Create scheduled task
- Click the
+button to the right ofmy task. - Select the template you just created.
- Fill in the task variables, task interval, task group and task execution time.
- Click the
Testbutton to test the task. - Click the Save button to save the task.